Emulating the Atari 2600's Scanline Renderer
Rather than a detailed walkthrough, this is more of a compendium of notes of my attempt to emulate the scanline renderer for the Atari 2600. As such, it’s pretty loosely written and assumes existing emulation development experience.
The code for my emulator is available on Github.
Polynomial counters are at the core of rendering. It’s just a counter. It counts from 0 to something at some rate. And then it wraps back around to 0 and starts again.
The counters are clocked at 1/4 the rate of the Television Interface Adaptor (TIA), so for every 4 clocks of the TIA, the polynomial counter is clocked once. There are 160 visible pixels in a scanline, which means we get 40 full clocks of the polynomial counter per scanline. So the counters count from 0 to 39, and they count up once every 4 clocks of the TIA.
There is a counter specifically for horizontal syncing (HSYNC), and the playfield (background) uses the HSYNC counter to render, however I used a specific counter for the playfield. The player, missile, and ball sprites all have their own counters. The sprites only render at certain points in the counter… they’re not rendering for all 40 clocks. Individual counters can be reset at different points of the scanline — via the RESxx registers of the TIA — in order to get different sprites to render at different horizontal positions on the screen.
Another important counter is the graphics scan counter. This counter is also present in the sprites. It’s described as a 3-bit binary counter, so it counts values from 0 to 7, and it is used to determine which bit of the 8-bit graphics register of the sprite to draw. It clocks along at a rate which is determined by the NUSIZx registers.
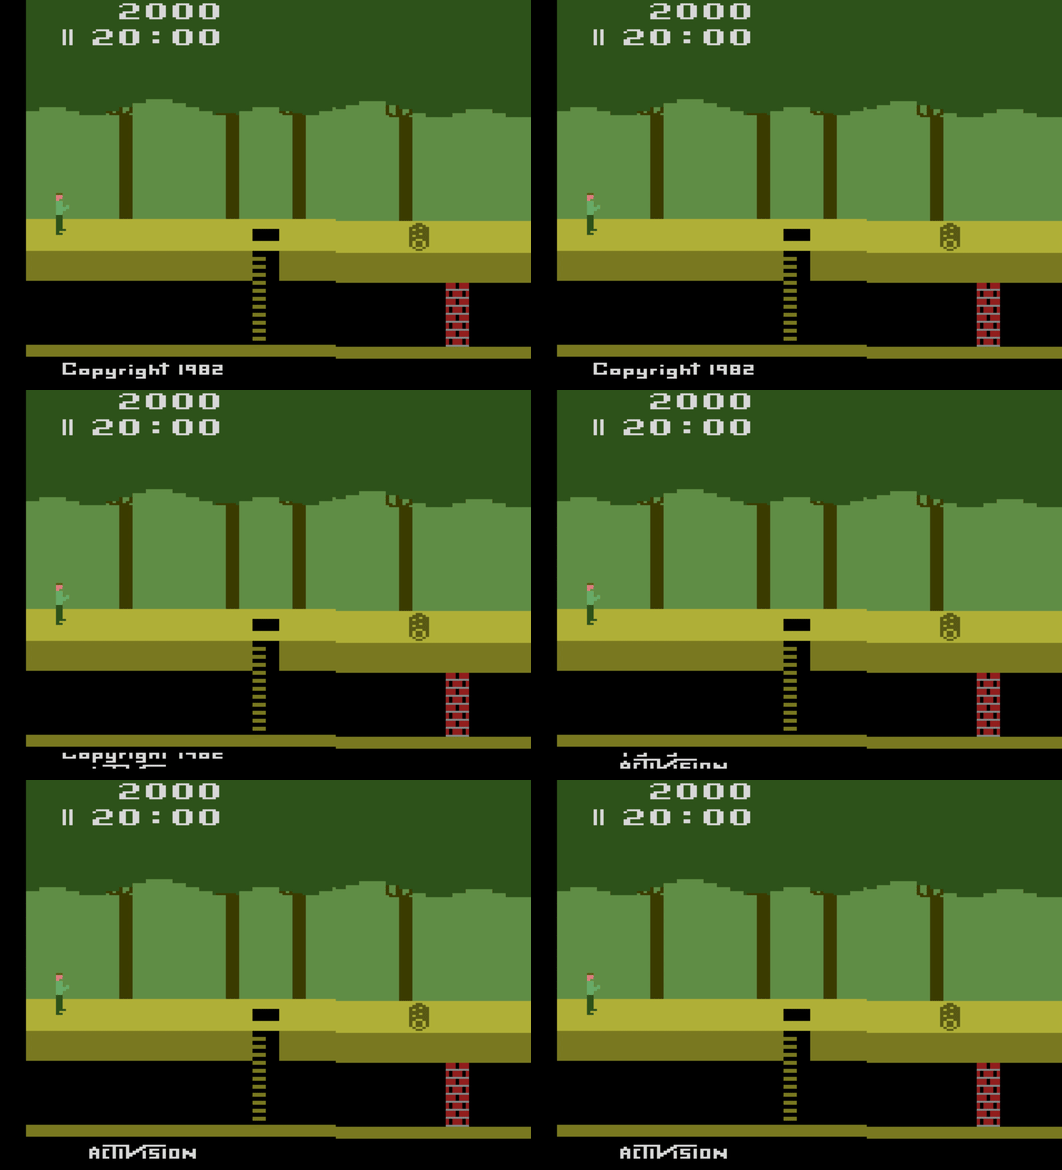
After fumbling my way through a naive initial implementation, based on whatever wisdom I had accumulated from my NES emulator, I ended up with this:
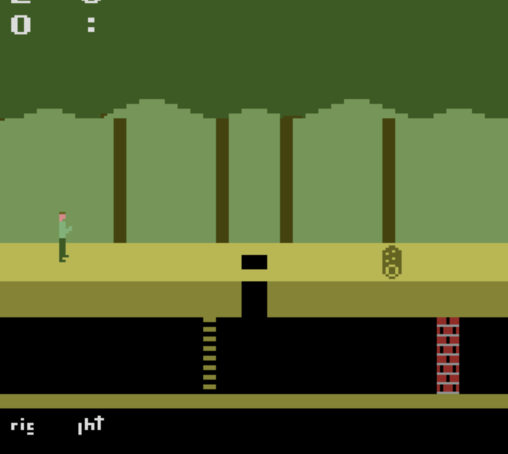
It’s not bad, but the horizontal position of the sprites is clearly off, and I don’t know what’s going on with the HUD, or the copyright message down the bottom…
At this point, I spent a lot of time re-implementing the counters as simply as possible, and it still wasn’t enough. I even blatantly copied code from other emulators, and it still wasn’t any better.
So I decided to move on, and see what happens.
I thought about implementing the RIOT chip — named for the RAM, I/O, and Timers that it encapsulates — which contains timers that I thought might affect how the sprites are being rendered. So with an initial cut of the RIOT chip, I got to this point:
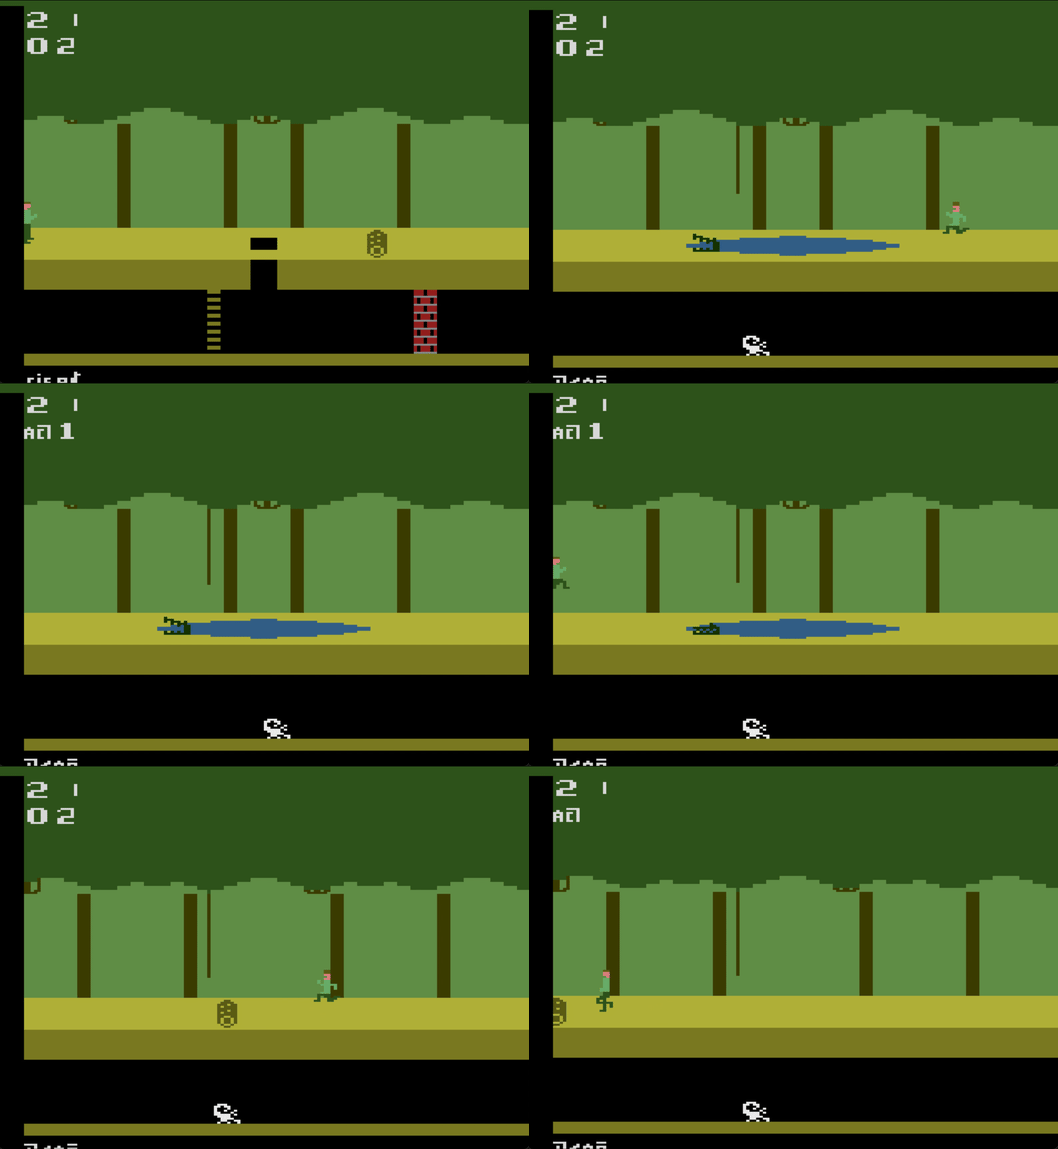
It’s a delightfully chaotic mess.
Pitfall Harry is running to the left on his own — I hadn’t hooked up any keyboard events to the controller yet, so this was strange — and the entire picture seems to be pushed down by a few pixels resulting in the bottom of the frame being cut off, but I guess things are kinda working?
It turns out I’ve initialised all of the movement registers in SWCHA to zero, and according to the docs, a zero means the button is pressed, so the game thinks every direction on the joystick is being pressed at once, and I guess the game code checks the left direction first.
With that fixed, and with the input registers also implemented — which are implemented in the TIA and not the RIOT chip for some reason — Pitfall Harry has stopped running and can jump!

He looks so happy!
At this point, I’m pretty happy with the graphics scan counter, since the correct bits of the player sprite are being drawn even when doing something like jumping.
Depending on the values in the NUSIZx registers, each bit of the graphics scan counter may be outputted multiple times before advancing to the next bit position. This results in a sprite being stretched wider. This means that the period of the graphics scan counter is extended by a factor determined by NUSIZx, or more simply put — we count from 0-7 at a slower rate.
With the implementation of the NUSIZx registers for the player sprites, and with a bug fixed in the frame timing, I end up here:
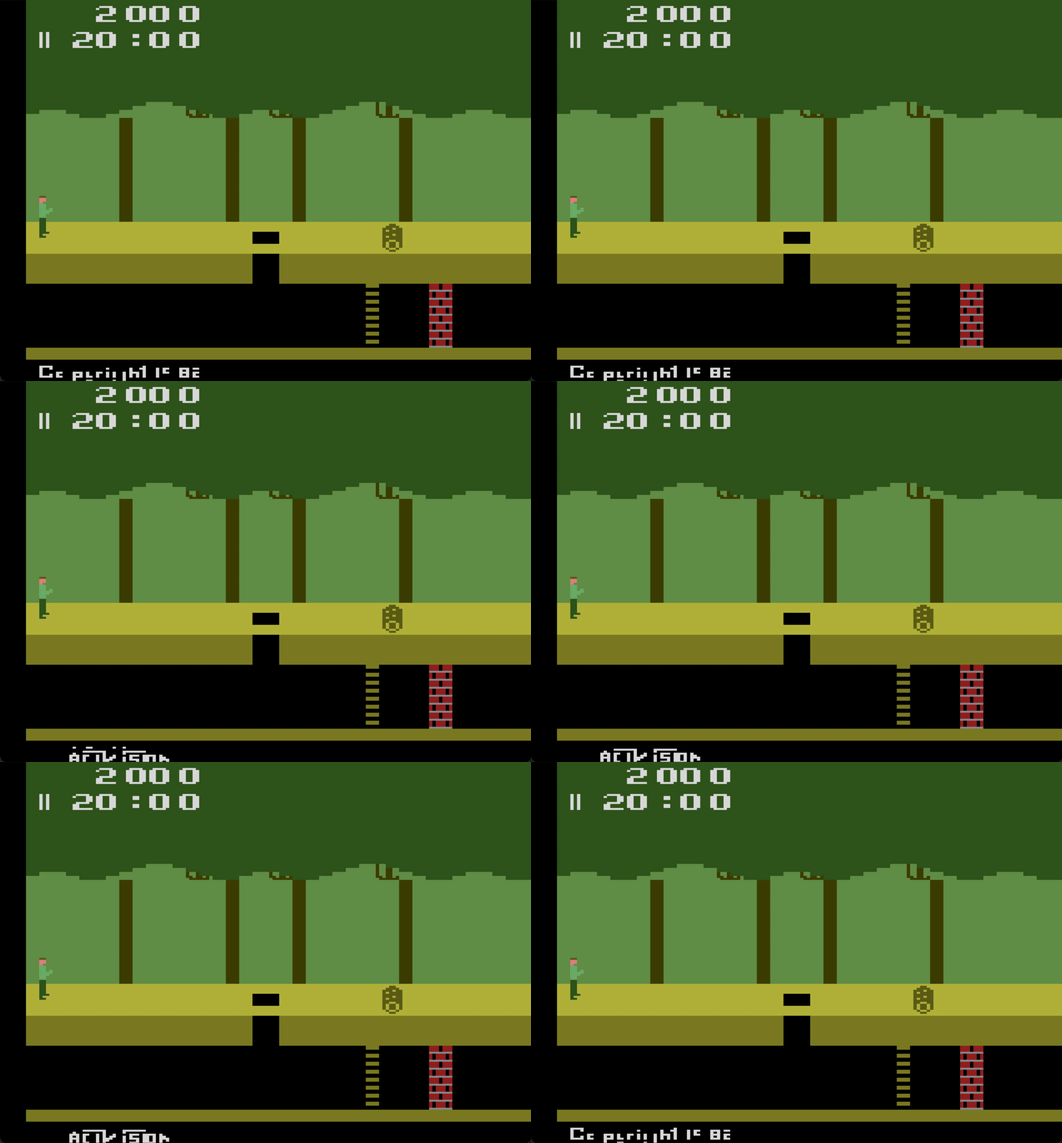
This is looking much better.
The horizontal positions of sprites are still off, but the frame hasn’t been pushed down a few pixels anymore, so I can see the entire frame.
At this point I made the CPU sub-instruction accurate, thinking that the timing issues were because I’m using the CPU as the leader and having the TIA and RIOT chips catch up, whereas based on everything I’ve read, philosiphically it feels like the TIA should be the leader, having the CPU and RIOT chips catch up.
Also, while staring at my rendering code for the millionth time, I fixed a stupid, yet critical bug. I was applying extra HMOVE clocks to the sprites, which is the correct thing to do when the HMOVE register has been written to, but I was only doing it during visible cycles during the 8 clocks between the Reset HBlank`position and the Late Reset HBlank position, which is only the first 8 rendered pixels on the left side of the screen, but I should also have been applying the extra HMOVE clocks during the horizontal blanking period aswell.
And with that, I end up with this:
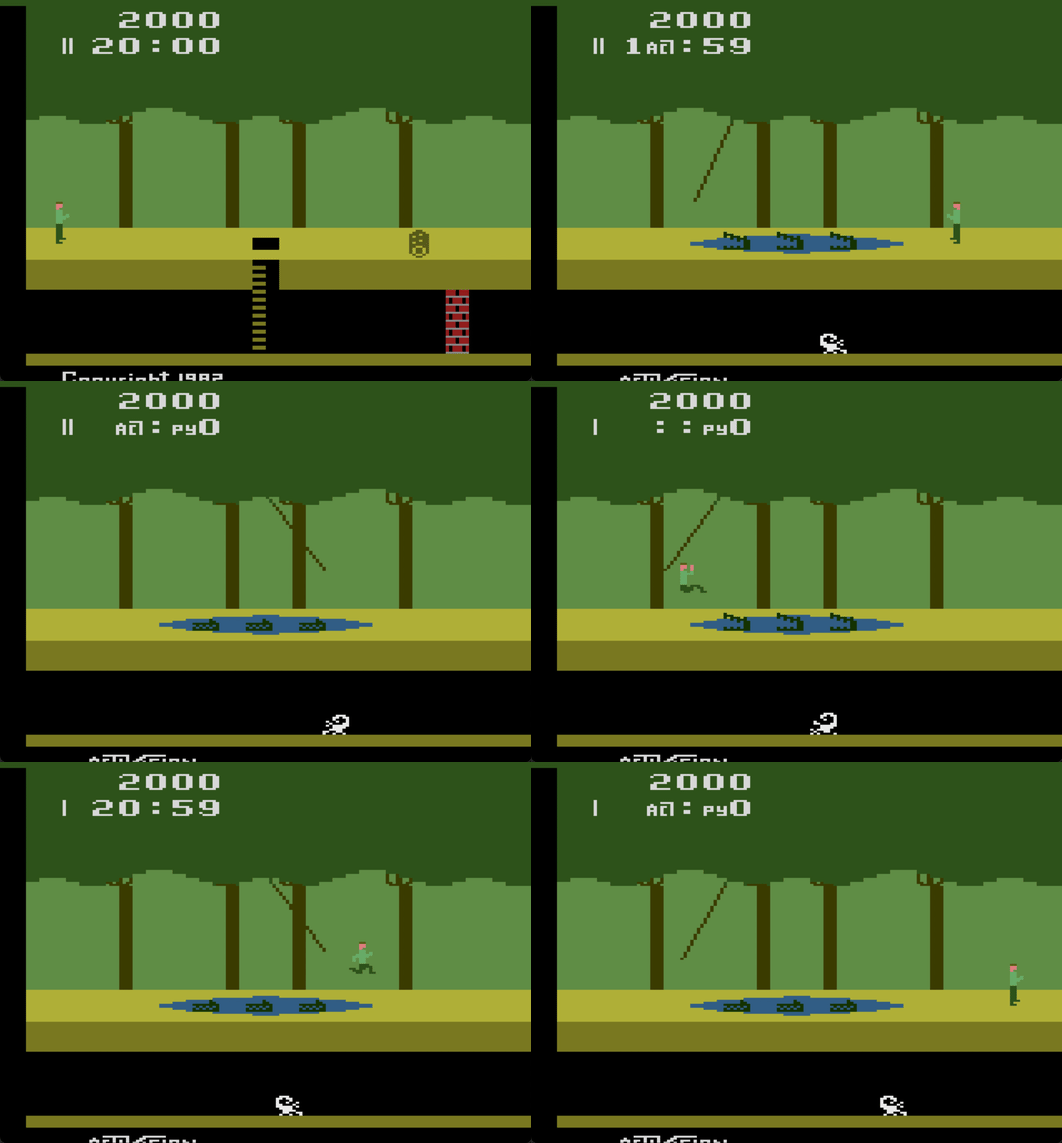
It’s so close now! The bottom HUD has been rendered correctly, although the entire frame has been pushed down by a few lines again. The sprite animation is smooth, so the application of HMOVE clocks feels accurate now, but the positions are still off.
When thinking about why the entire frame has been pushed down, I look at how I’ve been counting scanlines up to now:
- Assuming there’s always 3 VSync lines
- Assuming there’s always 37 VBlank lines
So in my TIA code, I’m keeping track of which scanline we’re up to, to know when we’re currently processing a visible scanline. Makes sense, right? It’s how I counted scanlines in my NES emulator, and that worked perfectly! What could possibly go wrong?!
Upon testing the assumption with some counting and debug logs, I discover that this is not the case. In Pitfall, I can see that there’s occasionally a 4th VSync line, and 40 VBlank lines… sometimes 41. In Adventure, I see that there’s mostly 36 VBlank lines per frame. Sigh…
So I change the way I’m processing a single frame to something like this:
// The main loop
loop {
    // VSync
    while tia.in_vsync() {
        process_scanline();
    }

    // VBlank
    while tia.in_vblank() {
        process_scanline();
    }

    // Visible lines
    while !tia.in_vblank() {
        process_scanline();
        render_scanline();
    }

    // Overscan
    while !tia.in_vsync() {
        process_scanline();
    }

    render_frame();
    handle_input();
}
The in_vsync() function checks if the second bit of VSYNC register is set. The in_vblank() function checks if the second bit of the VBLANK register is set. These registers are set by the game code, so we’re letting the game tell us what’s going on.
The process_scanline function clocks the TIA 160 times, since that’s how many clocks there are in a scanline. It also clocks the CPU and RIOT chips to keep them in time with the TIA.
And voila!
The frame is in the right position again, but the sprites are still shifted left by a few pixels, and the entire frame is shifted down by one pixel about two thirds of the way across.
Unrelated to the graphics, I also fixed the implementation of binary-coded decimal in my CPU for the ADC and SBC instructions, so the score and time count down/up correctly. As a side note, different variations of the 6502 CPU handle the setting of status flags in binary-coded decimal differently, so… yeah, that wasn’t confusing at all.
I looked around at what code messes with the scanline counting, and found the RSYNC register, which is meant to reset the HSYNC counter when any value is written to that register. The code looks simple enough:
    // RSYNC   <strobe>  reset horizontal sync counter
    0x0003 => { self.ctr.reset() },
TIA_HW_Notes.txt gives some more context:
RSYNC resets the two-phase clock for the HSync counter to the H@1 rising edge when strobed.
A full H@1-H@2 cycle after RSYNC is strobed, the HSync counter is also reset to 000000 and HBlank is turned on.
So in my counter code, I add the ability to reset to H@1, and then reset back to 0 after a full H@1-H@2 cycle — which is 8 clocks.
    pub fn reset_to_h1(&mut self) {
        self.internal_value = self.value() * 4;
        self.reset_delay = 8;
    }

    pub fn clock(&mut self) -> bool {
        if self.reset_delay > 0 {
            self.reset_delay -= 1;

            if self.reset_delay == 0 {
                self.reset();
            }
        }

        ...
    }
I’m sure this is not the most accurate way to emulate this behaviour, but it feels like a good place to start, and I’m not aiming for super duper high accuracy in all games, so hopefully it’s enough.
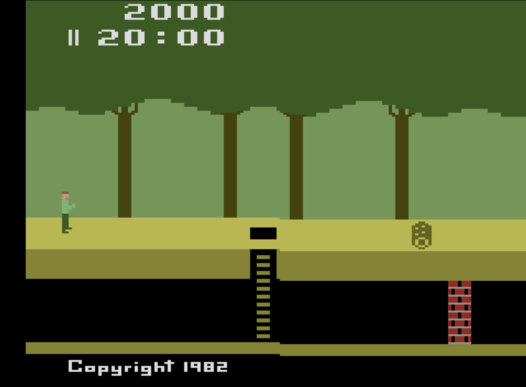
And wow! For the first time, the sprite positions are in the correct spot! But there’s still that problem of the frame being shifted down one pixel just after the ladder.
I don’t know why this is happening, however my primary goal for this emulator was to play Adventure, which does not have this rendering problem, so I’m going to ignore it!
Next up, emulating the audio. The saga continues…
Resources:
- Atari 2600 Specification — Important for implementing most of the TIA and RIOT chips.
- TIA_HW_Notes.txt — Crucial for understanding how the TIA renders the playfield and sprites, how the counters work, and how the HMOVE register affects sprite positions.
- ruby2600 — I used this emulator’s code to help understand any confusing docs, since the code is fairly easy to read, even for me as someone who is not a Ruby programmer.